
Demystifying Replication and Sharding in MongoDB

A creative technologist with problem-solving, competitive coding, full-stack development and design experience. I am motivated to get exposure to different problem statements related to full-stack development and user experience. Blogging away my thoughts in the meantime.
Making a MongoDB cluster "Production Ready" by performing database Replication and Sharding (horizontal fragmentation)
What is Replication?
Replication is the method of duplication of data across multiple servers. For example, we have an application and it reads and writes data to a database and says this server A has a name and balance which will be copied/replicate to two other servers in two different locations.
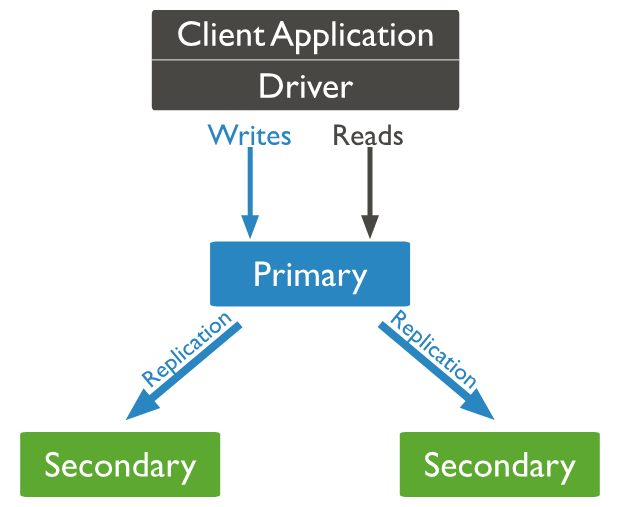
By doing this, will get redundancy and increases data availability with multiple copies of data on different database servers. So, it will increase the performance of reading scaling. The set of servers that maintain the same copy of data is known as replica servers or MongoDB instances.
Why Replication?
High Availability of data disasters recovery
No downtime for maintenance ( like backups index rebuilds and compaction)
Read Scaling (Extra copies to read from)
What is Sharding?
Sharding is a method for allocating data across multiple machines. MongoDB used sharding to help deployment with very big data sets and large throughput the operation. By sharding, you combine more devices to carry data extension and the needs of read and write operations.
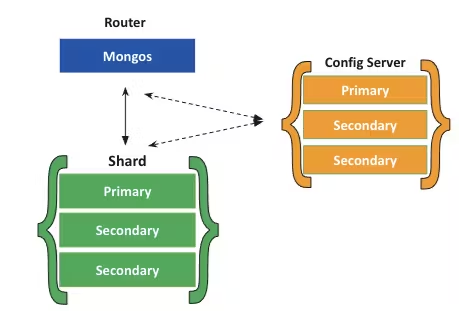
A sharded cluster consists of 3 things -
Shards - A replica set that contains a sunset of the cluster’s data
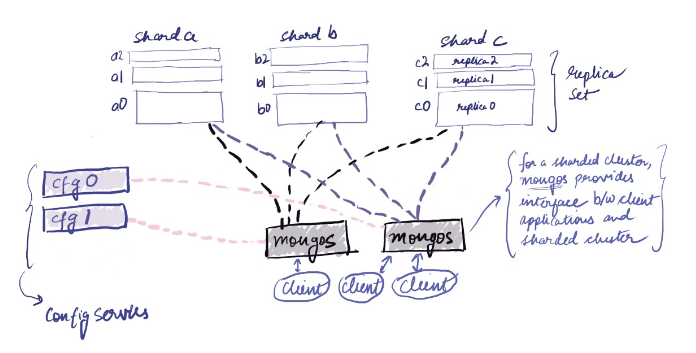
Mongos - For a sharded cluster, mongos provides an interface between client applications and sharded cluster
Config Servers - They are the authoritative source of sharding metadata. The metadata contains the list of sharded collections, routing info etc.
Why Sharding?
Database systems having big data sets or high throughput requests can doubt the ability of a single server.
For example, High query flows can drain the CPU limit of the server.
The working set sizes are larger than the system’s RAM to stress the I/O capacity of the disk drive.
Performing Replication in MongoDB
Download MongoDB Community Server from here - https://www.mongodb.com/try/download/community
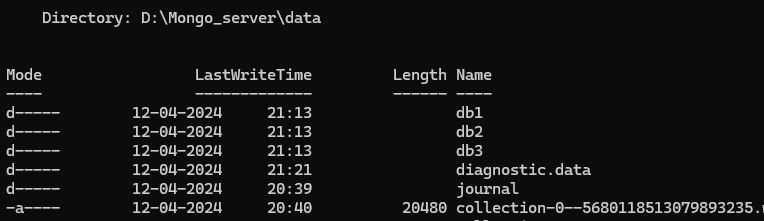
Go to \mongo\data\ folder
Create 3 folders named db1, db2, db3. Each folder represents a replica of our “ReplicaSet”
Open 3 terminals
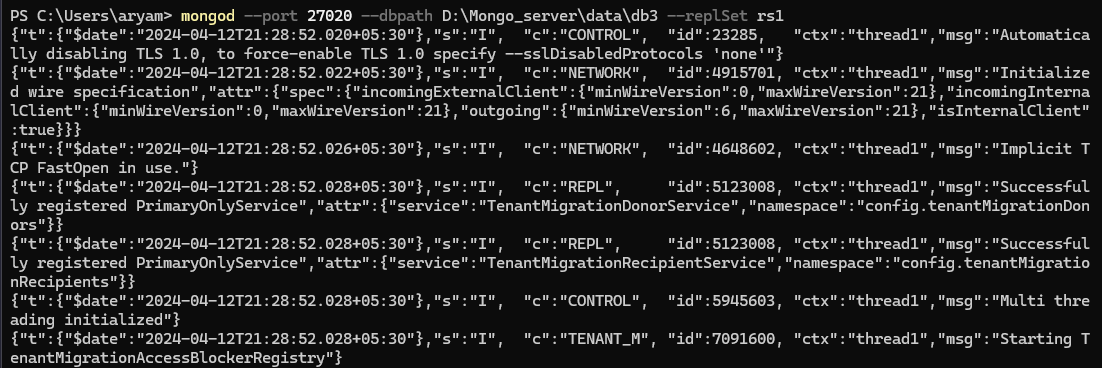
Run the first replica on port 27018 and name the replSet “rs1”
mongod --port 27018 --dbpath D:\Mongo_server\data\db1 --replSet rs1Do the same in other 2 terminals
 mongod --port 27019 --dbpath D:\Mongo_server\data\db2 --replSet rs1
 mongod --port 27020 --dbpath D:\Mongo_server\data\db3 --replSet rs1
Open another terminal and connect Mongo Shell to the server running on port “27018” -
mongo --port 27018Type the following command to initialize a replset “rs1” and add all 3 servers into it as replicas-
 rs.initiate({
     _id: “rs1”,
     members: [
       {_id: 0, host: “localhost:27018”},
       {_id: 1, host: “localhost:27019”},
       {_id: 2, host: “localhost:27020”},
     ]
 })
The replica with id:0 becomes the Primary Replica (the server running on port 27018, we are connected to it). You will be able to see primary like so -
Now lets connect to the replica server running on port “27019”. You can see that [secondary] is written here, indicating that it is a “Secondary Replica” -
Type the command
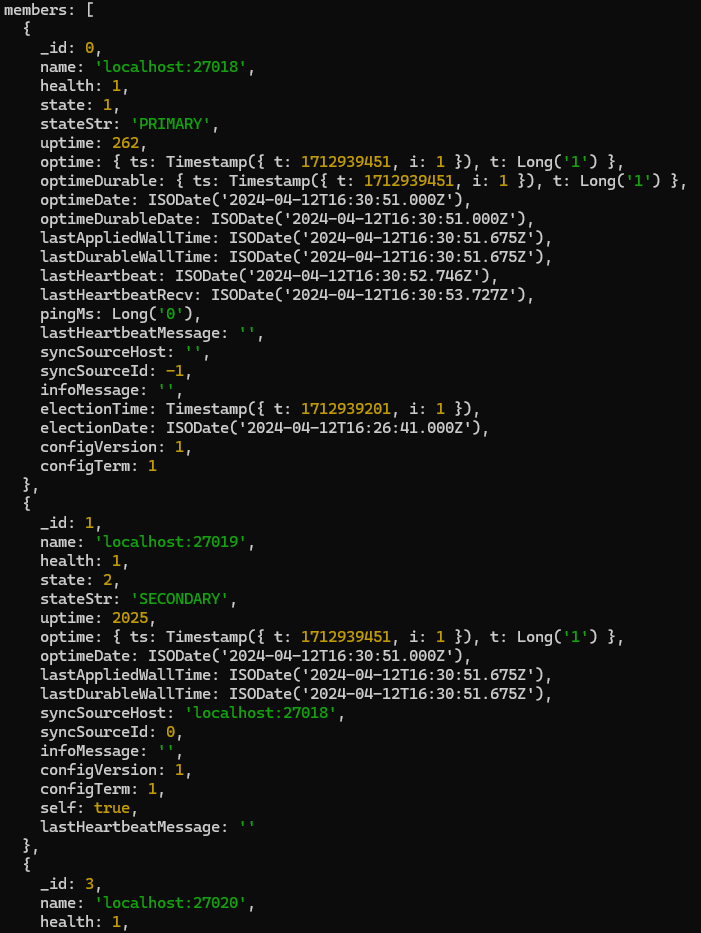
rs.status()to get status of the replication set.Here we can see 3 replicas in the current replSet “rs1”, having id 0, 1, 3. The id:0 member is ‘Primary’ repl, whereas id=1 and id=3 are ‘Secondary’ repls.

Data Replication in action
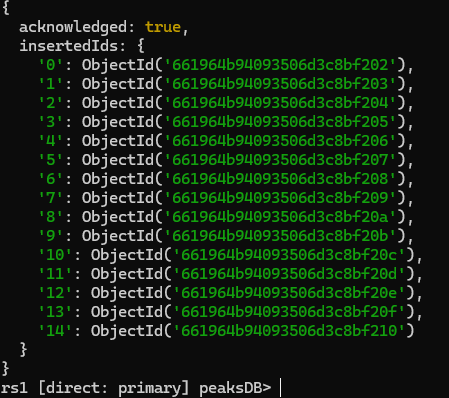
Insert data into primary repl
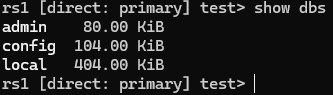
Going into a secondary repl and querying peaks collection in peaksDB gives us the replicated result -
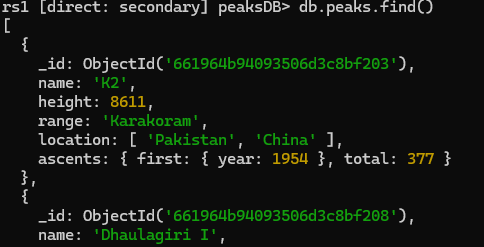
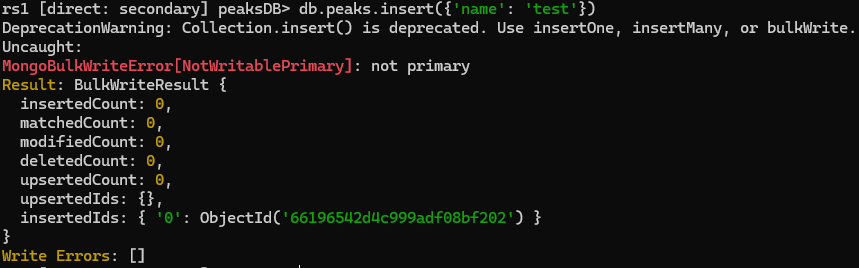
WE CANNOT WRITE INTO A REPLICATIONED/SECONDARY DATABASE, WRITES ARE ONLY ALLOWED IN THE PRIMARY REPL.
Performing Sharding in MongoDB
Here we can see the architecture of our sharded cluster. It consists of -
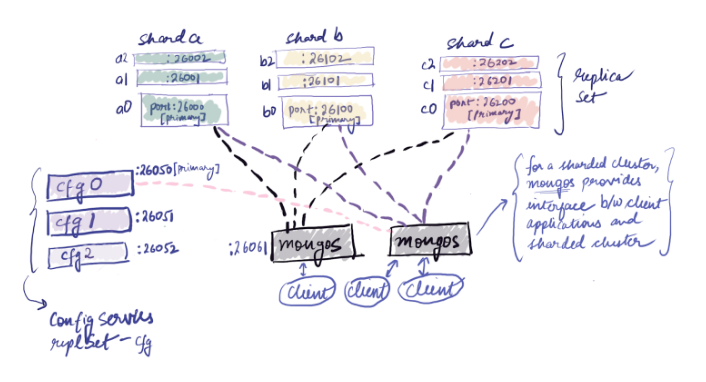
3 shards, namely ‘a’, ‘b’, ‘c’, where Primary Replicas would be running on port 26000, 26100, 26200 respectively (each shard has in total of 3 replicas)
Config server, having 3 replicas in the ‘cfg’ replSet, where the Primary Config Server would run on port 26050
Finally, the mongos server which is responsible to provide an interface to the client for interaction with the cluster. It would run on port 26061.
Steps to create the above sharded cluster
Go to \mongo\data\ folder
Make cfg0, cfg1, cfg2 (representing 3 replicas of the config server)
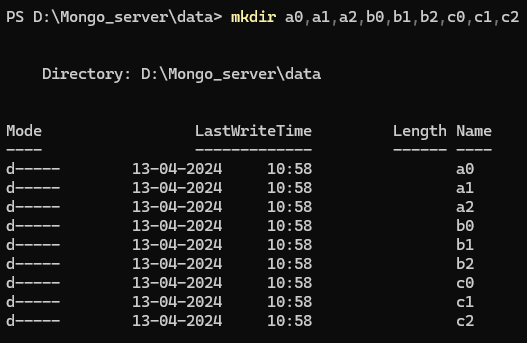
Make a0,a1,a2, b0,b1,b2, c0,c1,c2 (represents the replicas of shard a, b, c respectively)
Run the 3 config servers in different terminals -
mongod --configsvr --dbpath cfg0 --port 26050 --logpath log.cfg0 --replSet cfgmongod --configsvr --dbpath cfg1 --port 26051 --logpath log.cfg1 --replSet cfgmongod --configsvr --dbpath cfg2 --port 26052 --logpath log.cfg2 --replSet cfgHere,--configsvr represents that we are creating a config server, –dbpath represents the folder of that config replica, –port represents the port number on which I want the server to run, –logpath represents the log file of the particular server, and –replSet represents the name of the Replication Set.
Attaching mongo shell to the config server running on port 26050 (as we want to make this server as the Primary Replica of the replSet)
mongosh --port 26050Initiate Replication Set for the config server, and add the other 2 servers to the set -
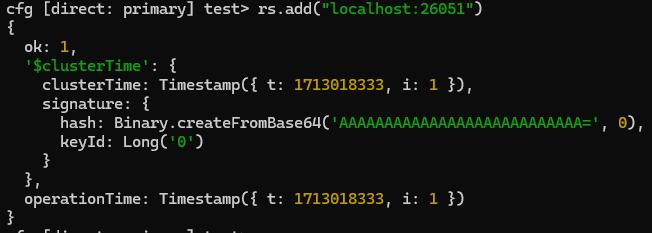
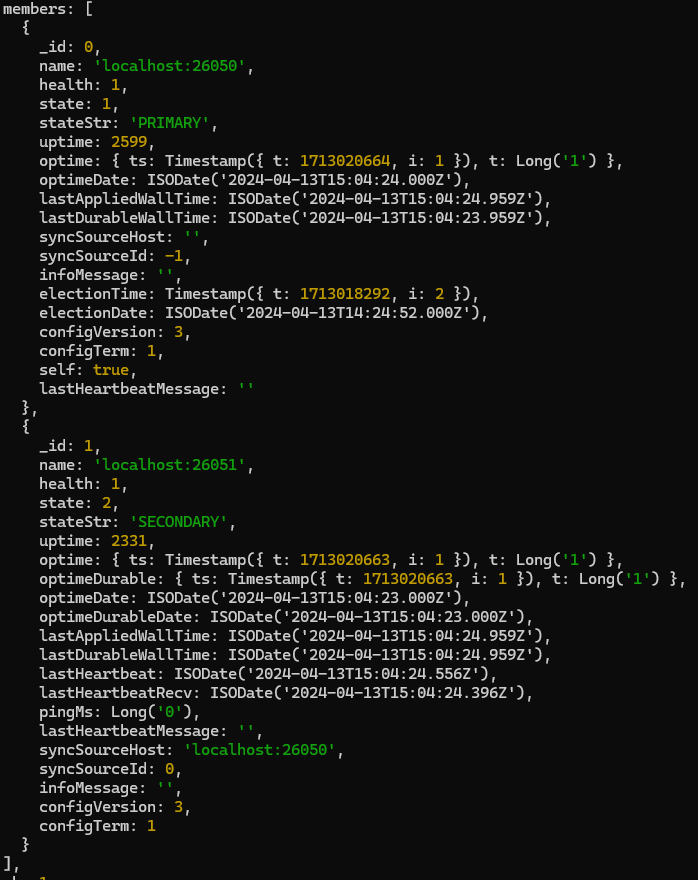
 rs.initiate()
 rs.add(“localhost:26051”)  #Adding the other config server to the replSet
 rs.add(“localhost:26052”)
Doing
rs.status()we can see the members of the replica set -Now launch the servers for the shard ‘a’ having replicas a0, a1, a2 in it’s replSet (each server should be launched in different terminals) -
mongod --shardsvr --replSet a --dbpath a0 --port 26000 --logpath log.a0mongod --shardsvr --replSet a --dbpath a1 --port 26001 --logpath log.a1mongod --shardsvr --replSet a --dbpath a2 --port 26002 --logpath log.a2Do similar to create shards ‘b’ and ‘c’ -
 mongod --shardsvr --replSet b --dbpath b0 --port 26100 --logpath log.b0
 mongod --shardsvr --replSet b --dbpath b1 --port 26101 --logpath log.b1
 mongod --shardsvr --replSet b --dbpath b2 --port 26102 --logpath log.b2
mongod --shardsvr --replSet c --dbpath c0 --port 26200 --logpath log.c0 mongod --shardsvr --replSet c --dbpath c1 --port 26201 --logpath log.c1 mongod --shardsvr --replSet c --dbpath c2 --port 26202 --logpath log.c2We can see the servers are actively “LISTENING” on all the ports -
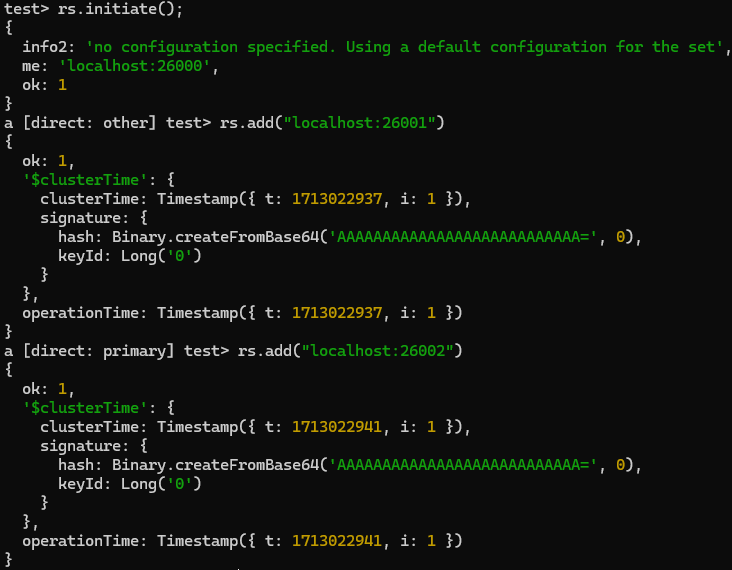
Now open a new terminal and connect a mongo shell to server running on port 26000, initiate a replSet and add replicas a1 and a2 to it (Inter-connecting the replSet ‘a’) -
mongosh --port 26000rs.initiate() rs.add(“localhost:26001”) rs.add(“localhost:26002”)Do the same for replSet ‘b’ and ‘c’ -
mongosh --port 26100
rs.initiate()
rs.add(“localhost:26101”)
rs.add(“localhost:26102”)
mongosh --port 26200 rs.initiate() rs.add(“localhost:26201”) rs.add(“localhost:26202”)The next step is to start the mongos instance (in a new terminal) which would be the interaction point of the client with the sharded environment -
mongos --configdb "cfg/localhost:26050,localhost:26051,localhost:26052" --logpath log.mongos1 --port 26061Here, –configdb represents the ip address of the 3 config servers we created earlier.
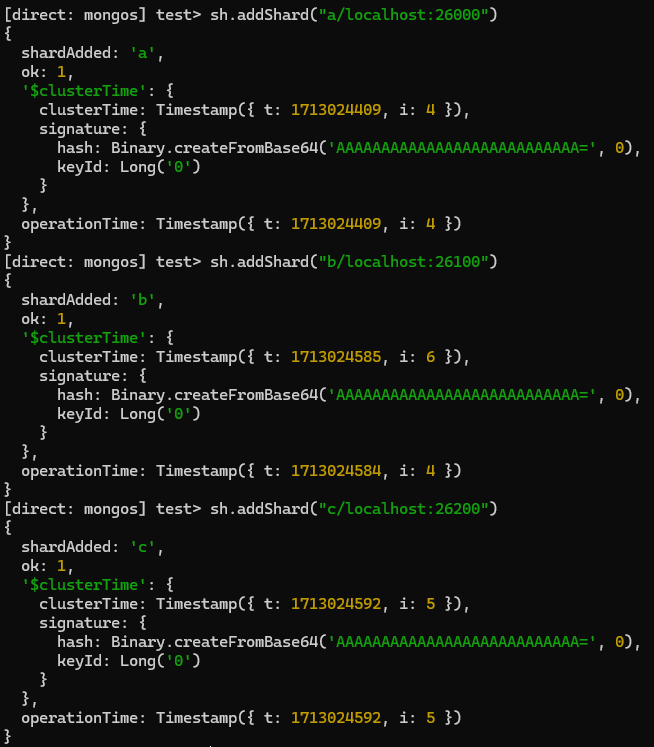
Now connect a mongo shell to this mongos instance (in a new terminal) and start adding the shards to it -
mongosh --port 26061
sh.addShard(“a/localhost:26000”)
sh.addShard(“b/localhost:26100”)
sh.addShard(“c/localhost:26200”)
In sh.addShard("a/localhost:26000"), ‘a’ represents replSet, and localhost:26000 represents the Primary Replica of ‘a’ replSet.
To see the status of the sharded environment -
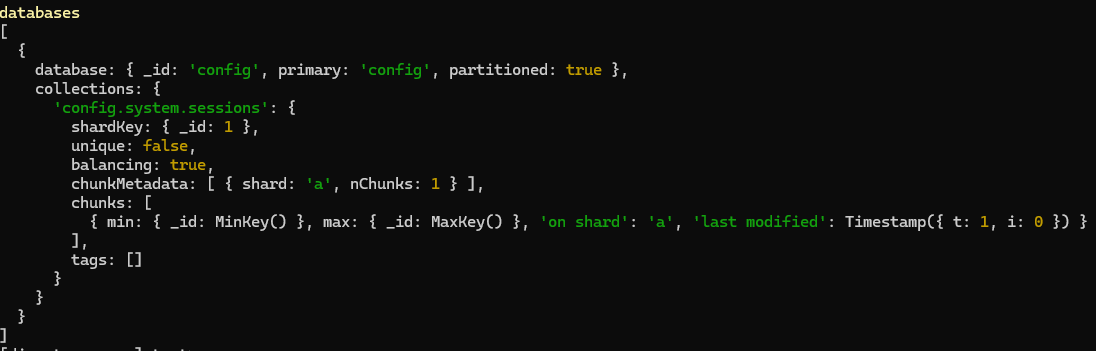
sh.status()We can see that the 3 sharded replSets have been added. Also 1 mongos instance is active.
Also, we can see that the currently sharded database is only config db, as we have not sharded any other database.
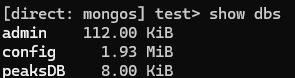
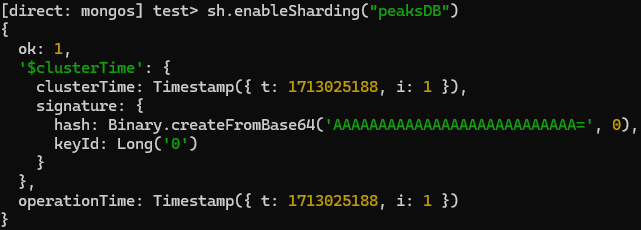
Lets add peaksDB for sharding -
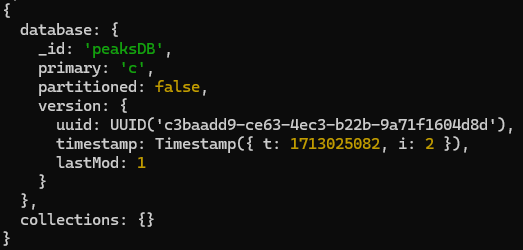
sh.enableSharding("peaksDB")Now doing
sh.status(), we can see “peaksDB” in “databases” field -We can see 1 sample document inside our ‘peaksDB.peaks’ collection. Lets shard the collection on ‘name’ field -
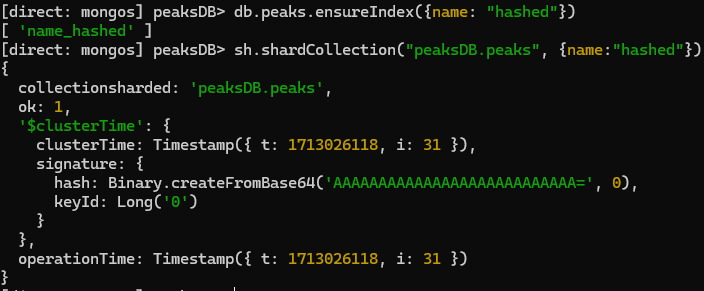
Create an index of the proposed shard key -
db.peaks.ensureIndex({name: "hashed"})Shard the collection using that key -
sh.shardCollection("peaksDB.peaks", {name:"hashed"})
Now doing
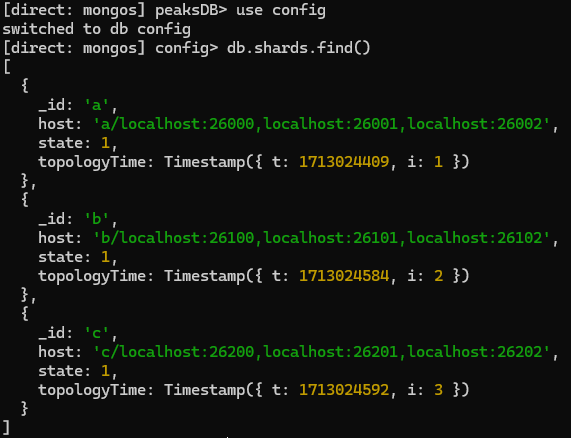
sh.status()we can see that for our collection “peaksDB.peaks” has a shardKey of ‘name’ and is present on shard ‘c’ -Finally, we can get more details of all the shards present -\
use config
db.shards.find()


References
https://www.mongodb.com/docs/manual/replication/
https://www.mongodb.com/docs/manual/sharding/
https://www.mongodb.com/docs/manual/core/sharded-cluster-config-servers/


